- Basic portal structure and its operation
- View pages (records reports)
- Edit forms (editing, records creation)
- Application groups
- Press reports
Working with view pages
The view pages are used to view the records and their categorized overview.
The view page usually contains a view table, (or several tables) that shows a number of records from the database. The number of records visible on the screen can be defined using the drop-down list in the lower left corner of the table. (If all records do not fit in the defined range, you can switch between the individual pages of the table using the buttons at the bottom of the table in the middle.)
If the table has the Details option enabled (see User settings below), after clicking on a certain record, a field with additional detailed information about the record will appear below the table – therefore no record is required to find out more information. always open. You can also move through the individual records in the table using the keyboard shortcut Ctrl down/up arrow.
Records from tables can be filtered, exported, etc. Hover over the table header to access more advanced spreadsheet functions.
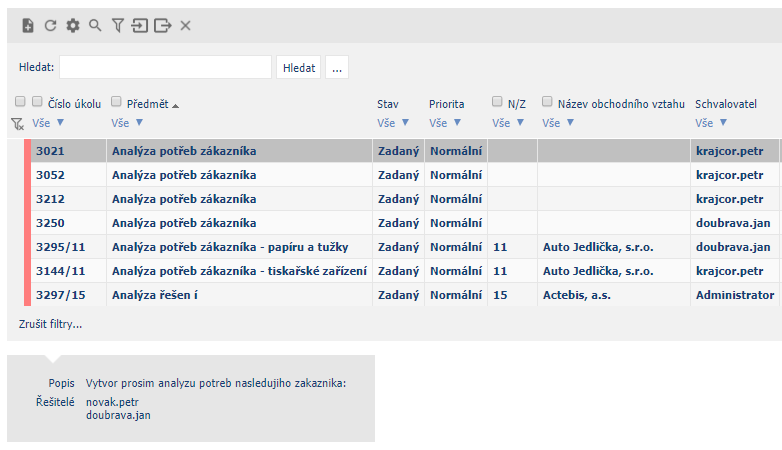
To open records in the view table, click on the pencil icon on the left side of the view table.
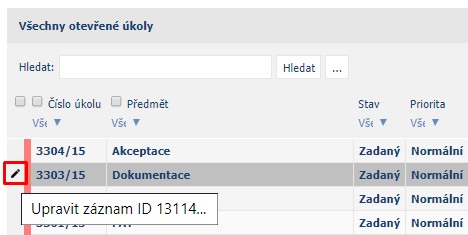
Advanced view table functions
You can access more advanced table functions by hovering the mouse cursor over the table header. The toolbar with more advanced functions temporarily replaces the table header with the table name and the number of records.
Description of icons in the view table
Creating a new record in the table = opening the corresponding edit form
Table view update
Table settings, defining your own show of columns and details, sorting records, etc ...
Enable/deny table search
Sets the default sort order for records in the table
Enable/deny bulk tagging of records in a table to assign value to tagged records using a filter or to delete tagged records
Creation of a new user advanced filter according to which records are filtered; eg “invoice price > 5000” and at the same time “due date = today”
Cancel all active filters in the table. Applied filters remain in effect even after the user who created them logs off. This is the only way to cancel them!
Importing data from a specific format (XLS, MS Excel, XML, ZIP, etc.). When importing data, the import file is selected and the columns to be imported into the table are defined. When defining the condition ID=ID, the existing records are replaced by the imported records.
Exporting data to a specific format (XLS, MS Excel, MS Word, etc.). Only the data showed in the table will be exported, with the specific number showed in the upper right corner of the table => If you want to export all data from the table, cancel any applied filters. If you want to export data with all physical columns (values), check the all columns option when exporting, otherwise data with only those columns that are showed in the view table will be exported..
Deletes all currently showed records in the view table from the DB table.
Full-text search
You can search the tables by entering the desired value in the text box at the top of the table and selecting the columns to be searched. After pressing the Search button, only those records that match the entered text will be showed.
In most tables, the filter for the search text remains active even after refreshing or leaving the page, and it is therefore necessary to select Cancel search or click on the icon to cancel the filter.
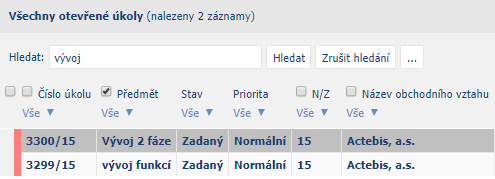
Simple record filtering
The data in the tables can also be easily filtered by certain columns. After selecting a value in the column, the data will be automatically filtered according to the selected criteria.
If the column contains more than 100 values, you must first click on the Load values option in the column filter to show the available values in the column. This is required for optimization and to significantly speed up the work with records. However, the limit of 100 values is only the default setting, which can be quickly changed at any time in the administrator mode.
You can also use the column value search system to easily select a filter value. When you select the value Search, a field for entering the desired column value is showed. This search can also be activated by double-clicking on the column filter. Even when entering the initial letters, the system continuously offers suitable values (so-called Whisper function).
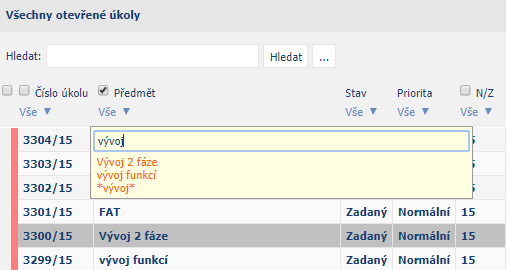
You can also enter a Custom filter with a condition (eg equals, contains, starts, larger, smaller, etc.).
Filters and recent searches remain active after you leave the page. It is therefore necessary to Cancel the filters and/or search (by selecting Cancel search or a funnel icon with a cross to cancel all filters).
Advanced record filtering - Composed condition
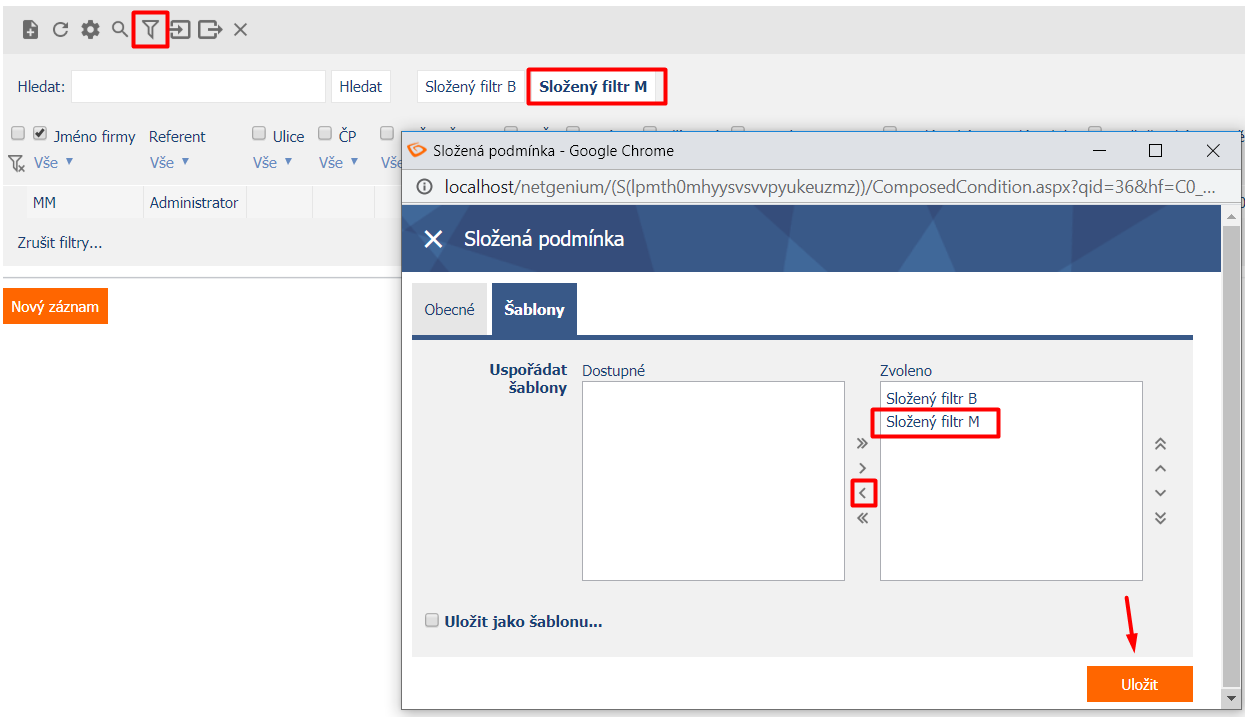
In advanced record filtering, you can set a combination of filters on several columns at once. To use this filter, use the funnel icon in the header of the view table .
After clicking it, the compound conditions editor will be showed. In this filter, the view table column is selected first, then the condition and value (see figure below).

You can create a button from a composite filter to reuse a combination of filters. When entering a compound filter condition, go to the Template tab, check Save as template..., name the button and save.
The button is inserted above the filtered table (after the search field).
The button can be deleted again in the compound conditions editor after clicking on the funnel icon in the table header – see the following figure.
Adding new records
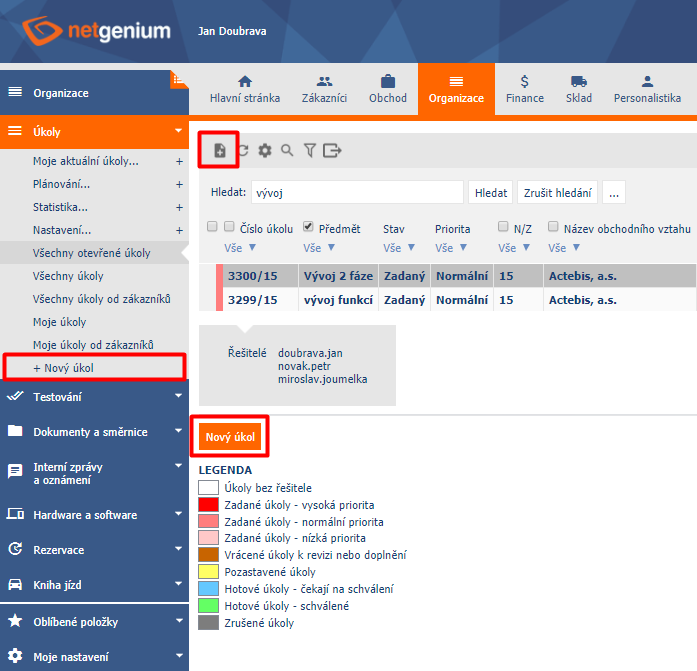
New records are created using the New record button (or eg New invoice, New employee etc ..) within the view table (alternative to the sheet icon in the header table, or plus in the menu in the navigation area).
Bulk edit edits
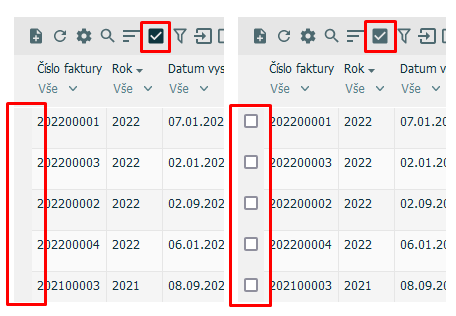
If multiple assignments are allowed in the table and in the table elements, you can edit or delete multiple records at once. Multiple assignments apply to all filtered records. If checkbox tagging is enabled and at least one record is tagged, multiple assignments will only be made to the tagged records.
If the records are validated before saving, only those records that have been validated will be saved after the multiple assignment. The same applies to bulk deleting if validation via record deletion is set. Error messages are not showed during these bulk edits.
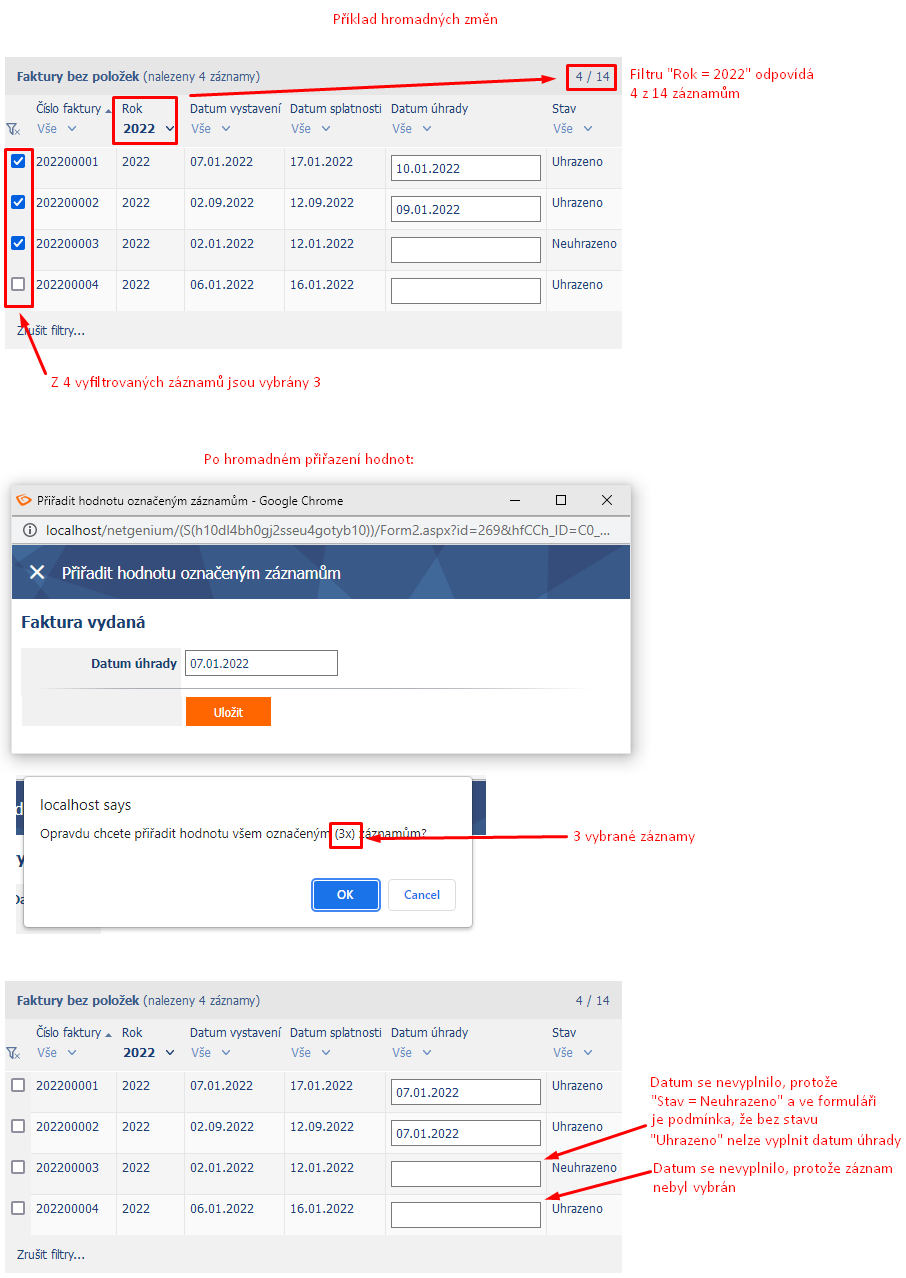
If the table has the Enable record tagging property, the checkboxes will always be visible. If not, you will be able to show or hide them with the toolbar button:
User settings
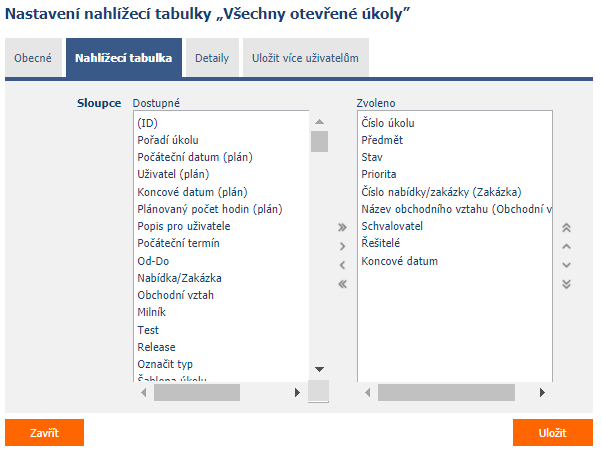
Unless customization is explicitly denied, the user can customize and view the view table. The gear icon in the table header is used for this view table setting.
In this setting, the user can show and hide the columns of the table (see the figure below), edit the show of filters, show of details, tooltips, etc.
Tree structure and calendars
Tree structure
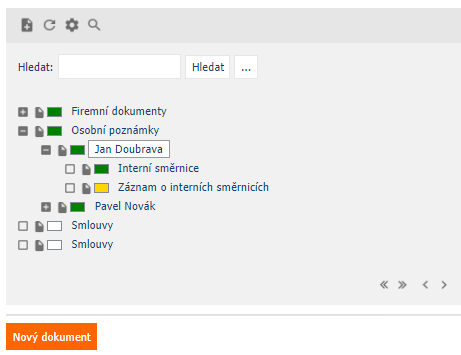
A tree structure is one way of showing view pages. This view is typically used for documents, for example. Using the ID and PID of the record, the hierarchy of the tree structure is set, where PID of the record (document) = ID of the parent record (document, category or folder).
The root record (with PID “0”) is created by clicking on the sheet icon with the bent corner in the header of the view table .
To create a child record in the tree structure, click on the sheet icon with the bent corner in the parent record .
Calendars and Schedulers
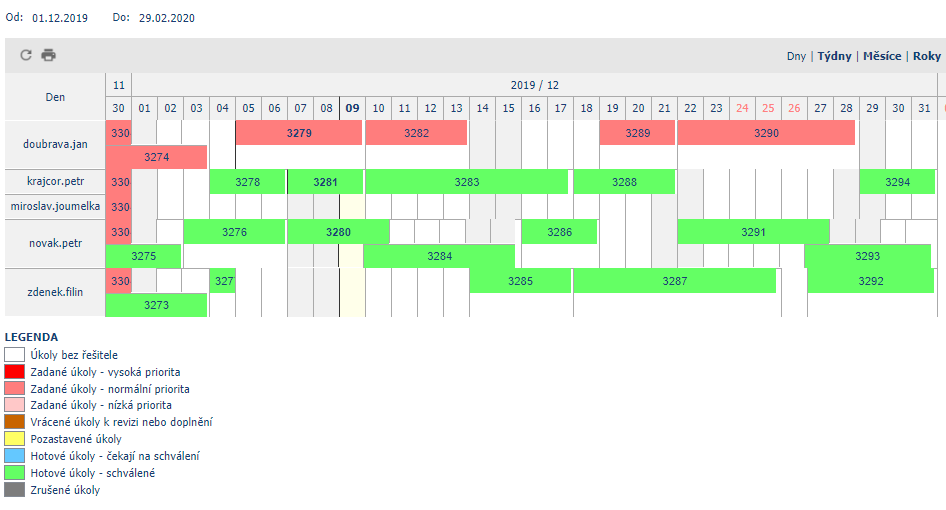
Calendars and schedulers are another type of view page view. It is used for clear show of records over time. In addition to calendars, NET Genium can show several types of schedulers (for example, Gantt chart, timetable, etc.).
