Manual in PDF format
1. Firebird database server installation
1.1. Download the installer
- Download the Firebird 3.0 database server installer, which can be found on its official website www.firebirdsql.org/en/downloadsunder the “Server Packages” category. There are several variants to choose from for 32-bit and 64-bit systems.
- Download the “Windows executable installer, recommended for first-time users” variant according to your system.
- This guide covers installing Firebird version 3.0.4. in the SuperServer version.
1.2. Firebird installation
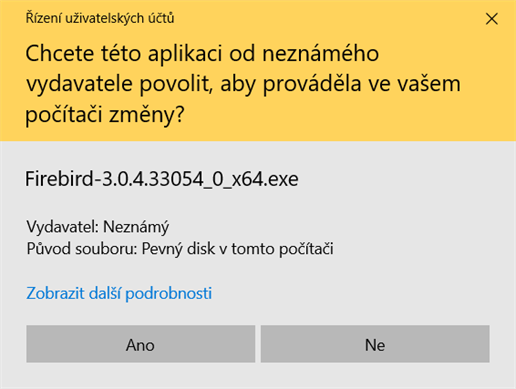
- After running the installer, you may be asked by the system if you want to allow the installer to make changes to your computer – select “Yes”.

- In the next step, select the required installation language, read and agree to the license agreement, and select the location where you want to install Firebird.
- The default path is “C:\Program Files\Firebird\Firebird_3_0”, do not change this path.
- Next, select “Run Firebird in SuperServer mode”.

- In the next step, you can set an optional password for the system database administrator – leave this field blank, which will automatically use the default password “masterkey”.

- At the end of the installation, an overview of the items that will be installed will be displayed. Click the “Next” button and select “Install”.
1.3. Editing “C:\Program Files\Firebird\Firebird_3_0\firebird.conf”
- Locate the “firebird.conf” file in the directory where the Firebird database program libraries are located – typically “C:\Program Files\Firebird\Firebird_3_0”, and open it for editing as an administrator.
- Find the line with the text “#DefaultDBCachePages =”, and immediately after this line insert a new one with the text “DefaultDBCachePages = 8192” without a sharp sign at the beginning of the line.
- Find the line with the text “#FileSystemCacheThreshold =”, and immediately after this line insert a new one with the text “FileSystemCacheThreshold = 65536” without a sharp sign at the beginning of the line.
- Find the line with the text “#TempCacheLimit =”, and immediately after this line insert a new one with the text “TempCacheLimit = 512M” without a sharp sign at the beginning of the line.
- Find the line with the text “#AuthServer =”, and immediately after this line insert a new one with the text “AuthServer = Legacy_Auth, Srp, WinSspi” without the sharp sign at the beginning of the line.
- Find the line with the text “#AuthClient =”, and immediately after this line insert a new one with the text “AuthClient = Legacy_Auth, Srp, WinSspi” without the sharp sign at the beginning of the line.
- Find the line with the text “#UserManager =”, and immediately after this line insert a new one with the text “UserManager = Legacy_UserManager” without a sharp sign at the beginning of the line.
- Find the line with the text “#WireCrypt =”, and immediately after this line insert a new one with the text “WireCrypt = Disabled” without a sharp sign at the beginning of the line.
- All the steps described above are incorporated in the “firebird.conf” configuration file template, which can be downloaded here.
- After changing the configuration file “firebird.conf” it is necessary to restart the Firebird database server, see chapter Restarting the Firebird database server.
1.4. Determining the version of the Firebird database server
- If the Firebird database server has been installed on your computer or server for some time and you need to find out which version it is, find the file “firebird.conf” in the directory where the Firebird database program libraries are located – typically “C:\Program Files\Firebird\Firebird_3_0“.
- Open the “firebird.conf” file and find the line with the text “ServerMode =”. The “=” is followed by the currently used version – Super, SuperClassic or Classic.
1.5. Restarting the Firebird database server
- If for some reason it is necessary to restart the Firebird database server, start the “Task manager” application.

- Then you need to select the “Services” tab and right-click on “FirebirdServerDefaultInstance” from the list of services. All you have to do is select an option from the menu that appears “Restart”.
- In some cases, it only happens that the service is stopped, so it is necessary to press again “Start”.

2. FlameRobin installation
2.1. Download the FlameRobin installer
- Download the FlameRobin installer, which can be found at:
www.flamerobin.org
2.2. FlameRobin installation
Read and agree to the license terms and click the button “Next”.

- Select the location where you want to install FlameRobin and click the button “Next”.

- You can then choose whether to place a program shortcut in the “Start” menu and an icon on the desktop.
- Click the button “Install”
- To continue using FlameRobin, you must create or register your new database server and its database.

2.3. Registration of an existing database
- To register an existing database, you must first have NET Genium installed.
- In FlameRobin, click on “Database” and select “Register existing database…”.

- Fill in:
- The path where you have the database stored
- Your database name (filled in automatically if you select the database path as the first step)
- Username “sysdba”
- Password “masterkey”
- Charset “WIN1250”
- Click the button “Save”.

