- Basic portal structure and its operation
- View pages (records reports)
- Edit forms (editing, records creation)
- Application groups
- Press reports
Working with edit forms
Edit forms are used when creating or editing existing records.
Forms contain various elements (text fields, lists, attachments), which are divided into individual sections using headings. In the case of longer forms, the content is structured into several tabs for easier work and better readability.
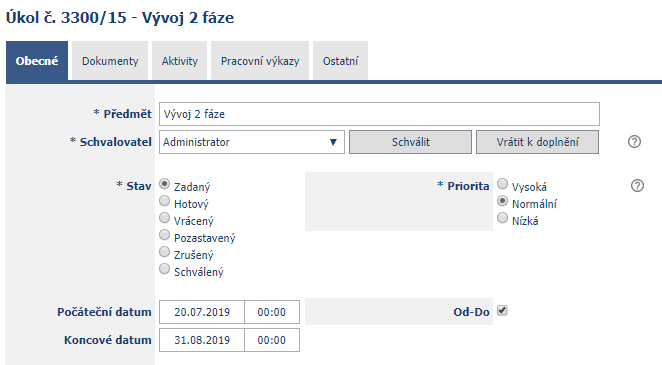
Help for controls
Help for each control is showed on the right side of the control. If a question mark icon is showed, the help is implicitly hidden and will be showed when this icon is clicked. Help is available on the vast majority of controls, the use of which can be initially ambiguous or confusing for users.

Saving and deleting records
The set of buttons at the end of the record form is used for its final saving or deletion. The entry will not be saved without pressing the “Save” button! After saving the record, the edit form closes and the view returns to the relevant view page. The “Save and continue editing” button is used to save the record, except that the record remains open. When creating multiple records at once, use the “Save and New” button, which will open another new blank form for the new record immediately after saving the record.

The functions listed below are mentioned due to their frequent occurrence in the edit forms of NET Genium applications.
View tables
The view tables (DataGrids) used in the edit forms are identical in functionality to the tables used in the view pages, but are usually used to show records that are in some way relevant to the open record (eg Invoice Items in the Invoice form).
For details on using view tables and their advanced functions, see view pages description.
Picker
“Picker” is the name of a control for selecting a specific value of a particular record from the list of records (for example, the supplier name from the supplier list). Clicking on the Picker icon shows a floating table with a list of records, which disappears again after selecting the record. If enabled, records can also be opened or even created within the Picker table.
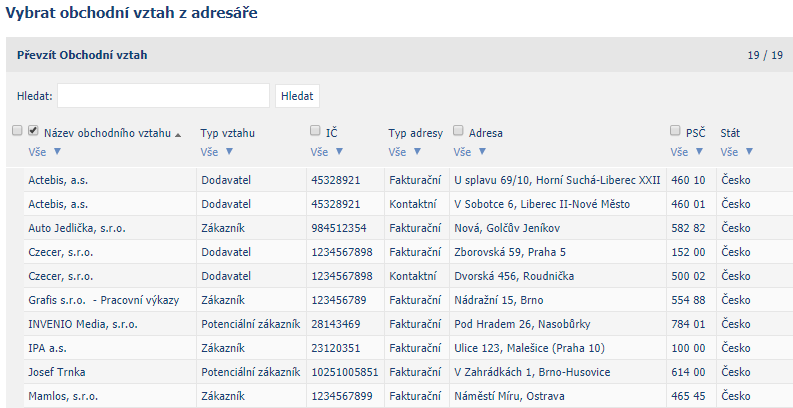
Because working with Picker tables is largely the same as working with view tables, for details on using Advanced Picker features, see the description of the view pages again in the Advanced view tables help.
Scope
The value of the “Scope” control determines to whom the record will be showed, ie. who has the right to view the record. “Scope” contains a list of users or even user groups. All users from the selected user groups, as well as those users who have been selected individually, will be allowed to view the record from the respective view pages.
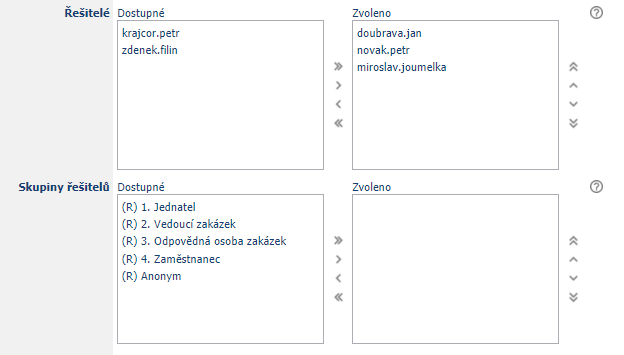
If we choose not to set Scope and do not select any user groups or users from the list, the record will be showed to all users.
Notify other users
The “Notify other users” checkbox allows you to inform other users of the system by e-mail about saving a particular record as part of a larger activity/task.
When the “Notify other users” option is checked, a field with a list of users and a field for entering a message will be showed. After saving the record, an e-mail will be sent to the selected users with a link to the record with an attached message.
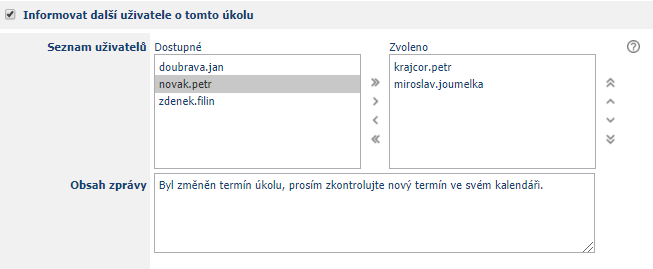
Although some user groups are automatically informed about the first storage of specific records (eg various requests), it often happens that for some reason it is necessary to immediately inform specific users, eg about a change in the value of a certain record during the process. In this case, it is advisable to use the Inform other users function.
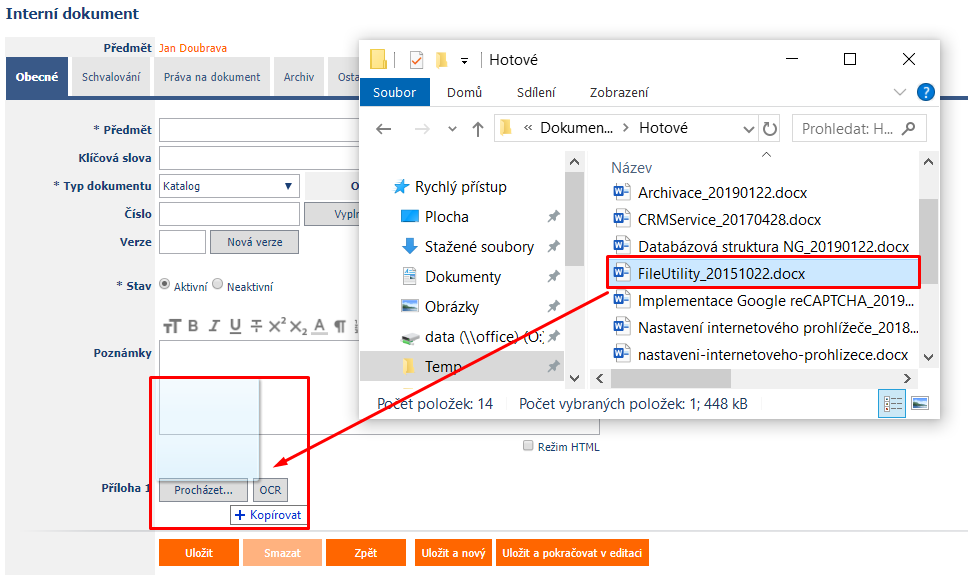
Drag and drop function
Everywhere in NET Genium, where file attachments can be attached (for example in documents), NET Genium (if it is open in the Google Chrome browser) supports the drag and drop function, ie. drag the file with the mouse.
List of keyboard shortcuts in the edit form
Ctrl + Backspace = “Back” in the edit form.
Ctrl + Enter = “Save” in the edit form.
Ctrl + Delete = “Delete” in the edit form.
Ctrl + 1 = “Save and new” in edit form.
Ctrl + 2 = “Save and continue editing” in the edit form.
